Table of Contents
SMX Plugin Installation Guide
Currently our SMX plugin requires a server with cPanel's free DNSONLY control panel to be installed and functional prior to installation.
Installing cPanel DNSONLY
Please follow the generic cPanel installation guide under the “Installation Process” section on this page. On Step 4, download the following installer instead:
curl -o latest-dnsonly -L https://securedownloads.cpanel.net/latest-dnsonly
The rest of the steps in the process are the same. The Initial Setup Wizard will also be slightly abbreviated as this is not the full cPanel version. Once the cPanel installation is complete, please proceed to the section below.
Installing SMX
Before installing SMX, ensure that you have given your SMX server a hostname that is unique. Generally speaking users choose something such as backupmx.domain.com for their SMX servers. A hostname needs to be fully qualified, such as the one given previously, and also needs to have a matching forward “A record” that maps to the IP of the SMX server. Once selected, the hostname of the server can be set using the following command:
hostname backupmx.domain.com
Then, installing SMX is a simple one-step process using the following one-line command:
cd /home; wget http://download.ndchost.com/pluginSMX/latest-pluginSMX;sh latest-pluginSMX
Once complete, you will find the SMX plugin link at the bottom of the WHM navigation menu under “Plugins”.
Configuring SMX
Trust Relationship
SMX requires that a secondary MX record be added for domains that are to be backed up using the SMX server. The first step in the process is to add a server to the trust relationship using the Add Server function inside the SMX plugin interface. This requires the access key from the remote cPanel server, which can be found in that server's WHM under Main » Cluster/Remote Access » Setup Remote Access Key.
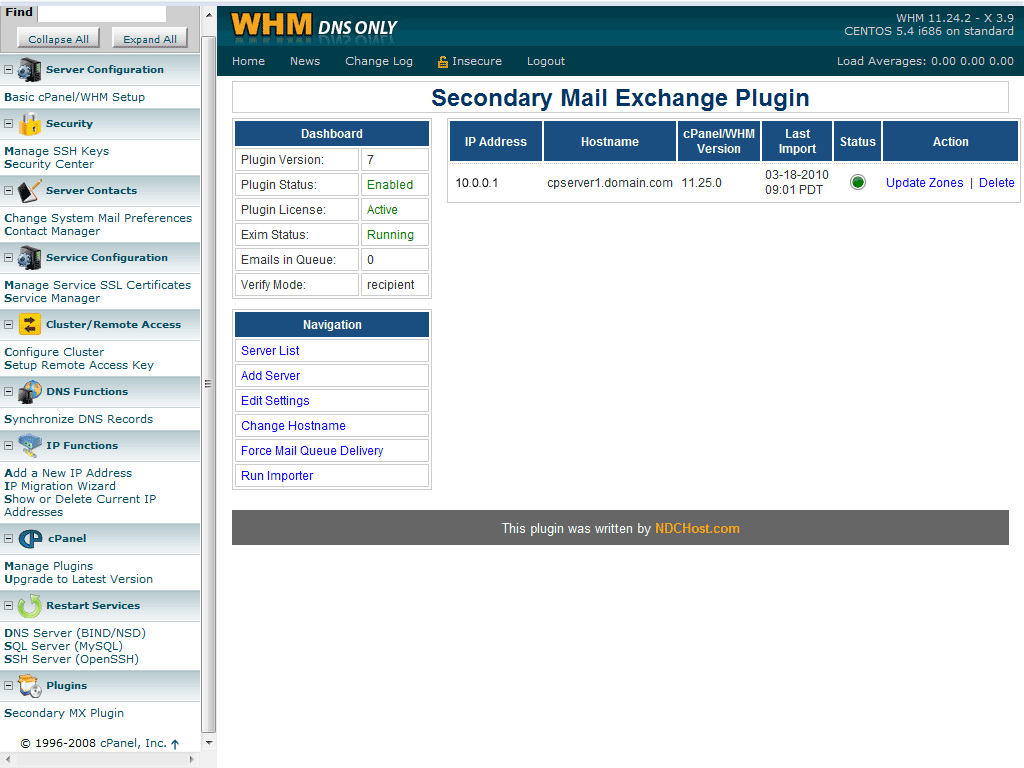
Once a trust relationship is established, you will see the status of that relationship listed in on the main SMX page. Having established the trust, the SMX server will automatically send calls to the main server to update the DNS zone files for all hosted domains to add the necessary secondary MX record. Your SMX screen will look like the one below when this process is complete:

DNS Zone Modifications
The default DNS zone template needs to be modified so that accounts/domains added in the future are also configured to use the SMX server. We have a separate guide for the instructions to modify this template; please contact support if you have any issues. You can also manually update the new zone files using the Update Zones link for the appropriate server on the main SMX page.
SMX Settings
The SMX Settings page is also worth a visit to ensure the SMX server is operating as you would expect it to, however generally the default settings are appropriate for most users. The effect of each setting is described on the settings page.
DNS Cluster Setup
If you are also planning on using the SMX server for secondary nameserver (recommended) and your primary nameserver is a full cPanel server, please see the following on cPanel's website: Configure DNS Clustering.
