How to Change Nameservers on all Zones in cPanel
Sometimes you may need to to change your Nameservers for your zone files. Using the following commands, you'll make the needed changes to have your server switched over to the new nameserver.
Change default nameserver in cPanel
Log into WHM, then go to Server Configuration » Basic cPanel & WHM Setup
At the bottom of the section you'll see an area called Nameservers
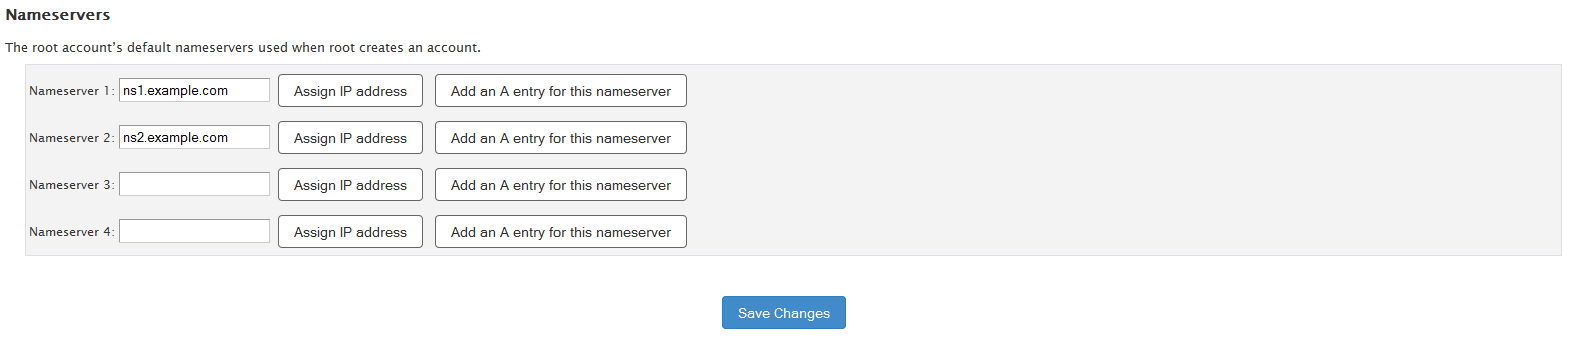
Change the entries to your new nameserver address then click Save Changes
Backup existing Zones
Make a backup of your existing zone files just in case something goes wrong. You can do this by running the following in the command line:
cp -rf /var/named /var/named.backup
Replace old nameserver entries
Next, replace your old nameserver entries in each zone by running the following command, while making sure to put your nameservers old and new addresses in the respective areas inside of the quotes.
Run the following code:
replace "old.example" "new.example" -- /var/named/*.db
Update the serials
In order to show that the file was updated, you'll need to update the serials of each zone file. Run the following command:
find /var/named/*.db -mtime -1 -exec perl -pi -e 'if (/^\s+(\d{10})\s+;\s+serial/i) { my $i = $1+1; s/$1/$i/;}' '{}' \;
Reload BIND
In order to have your server reflect the new zones, run the following command:
service named reload